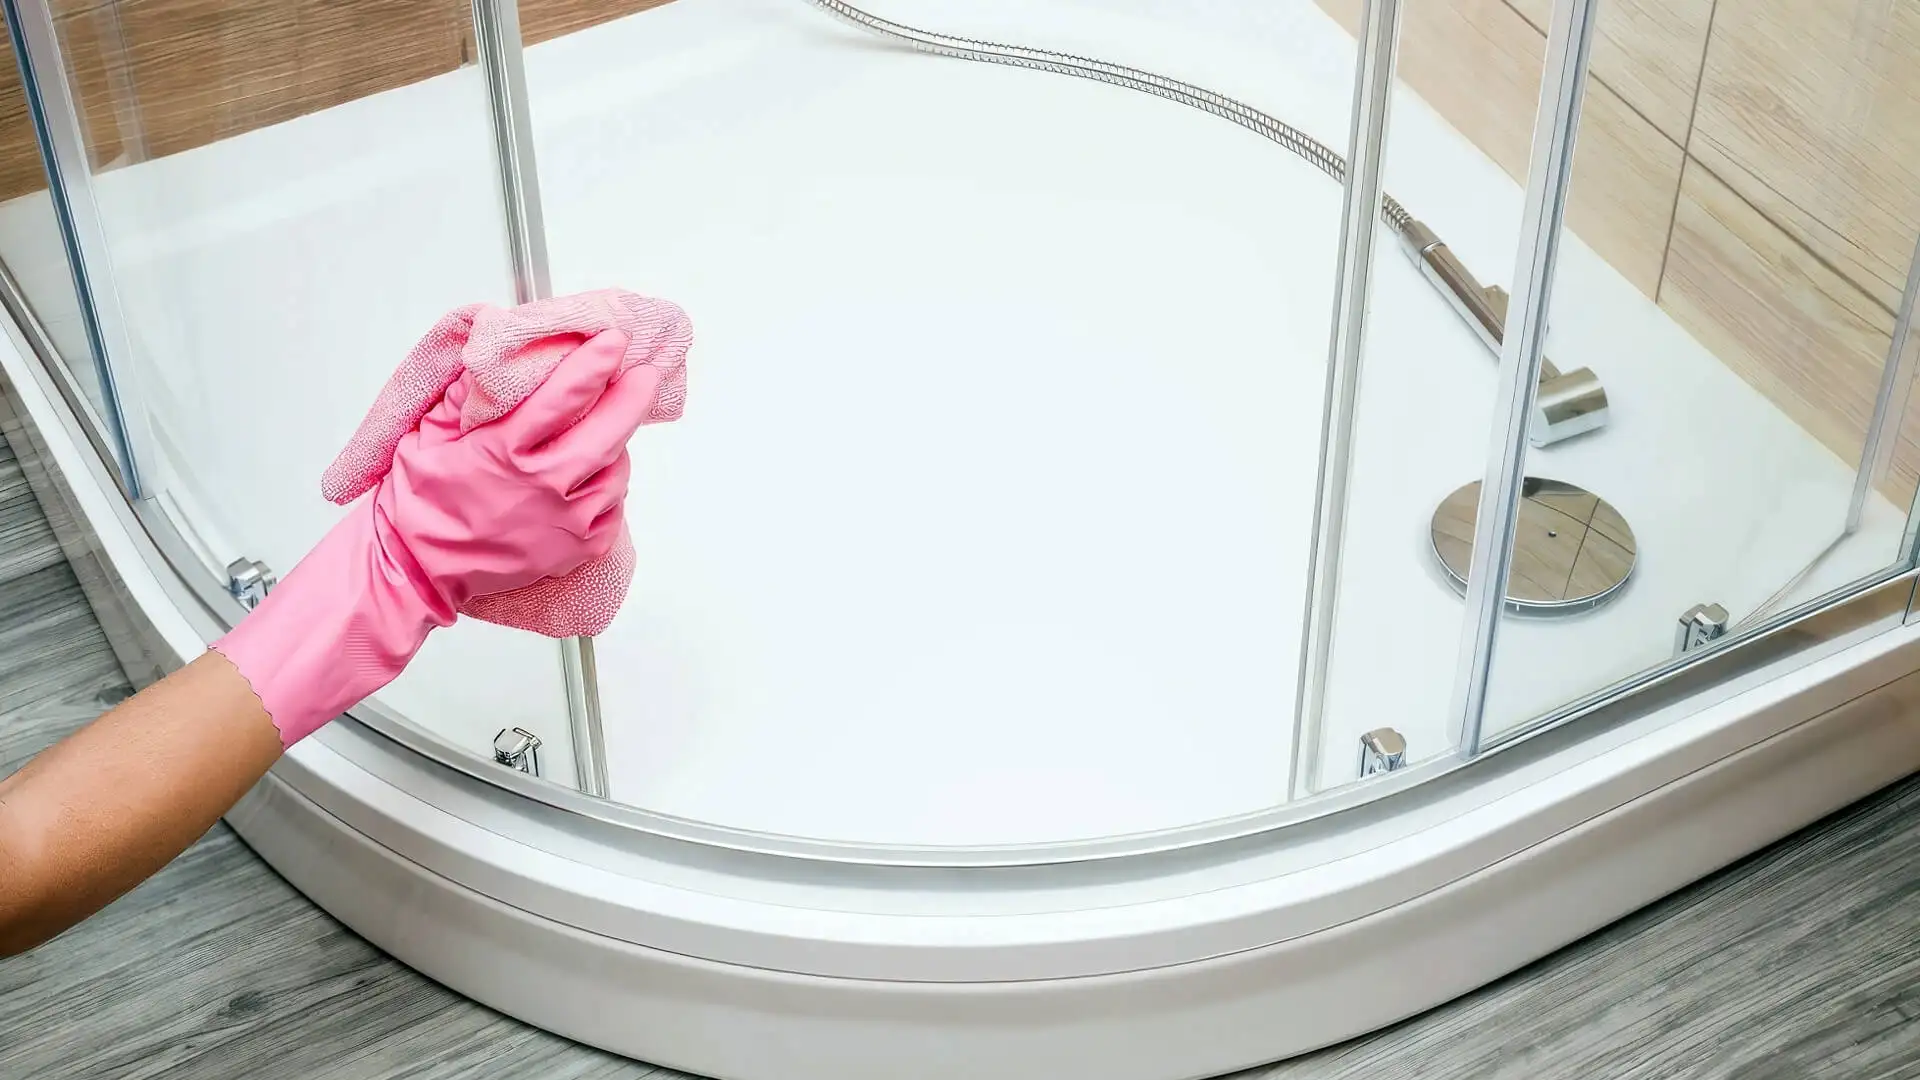
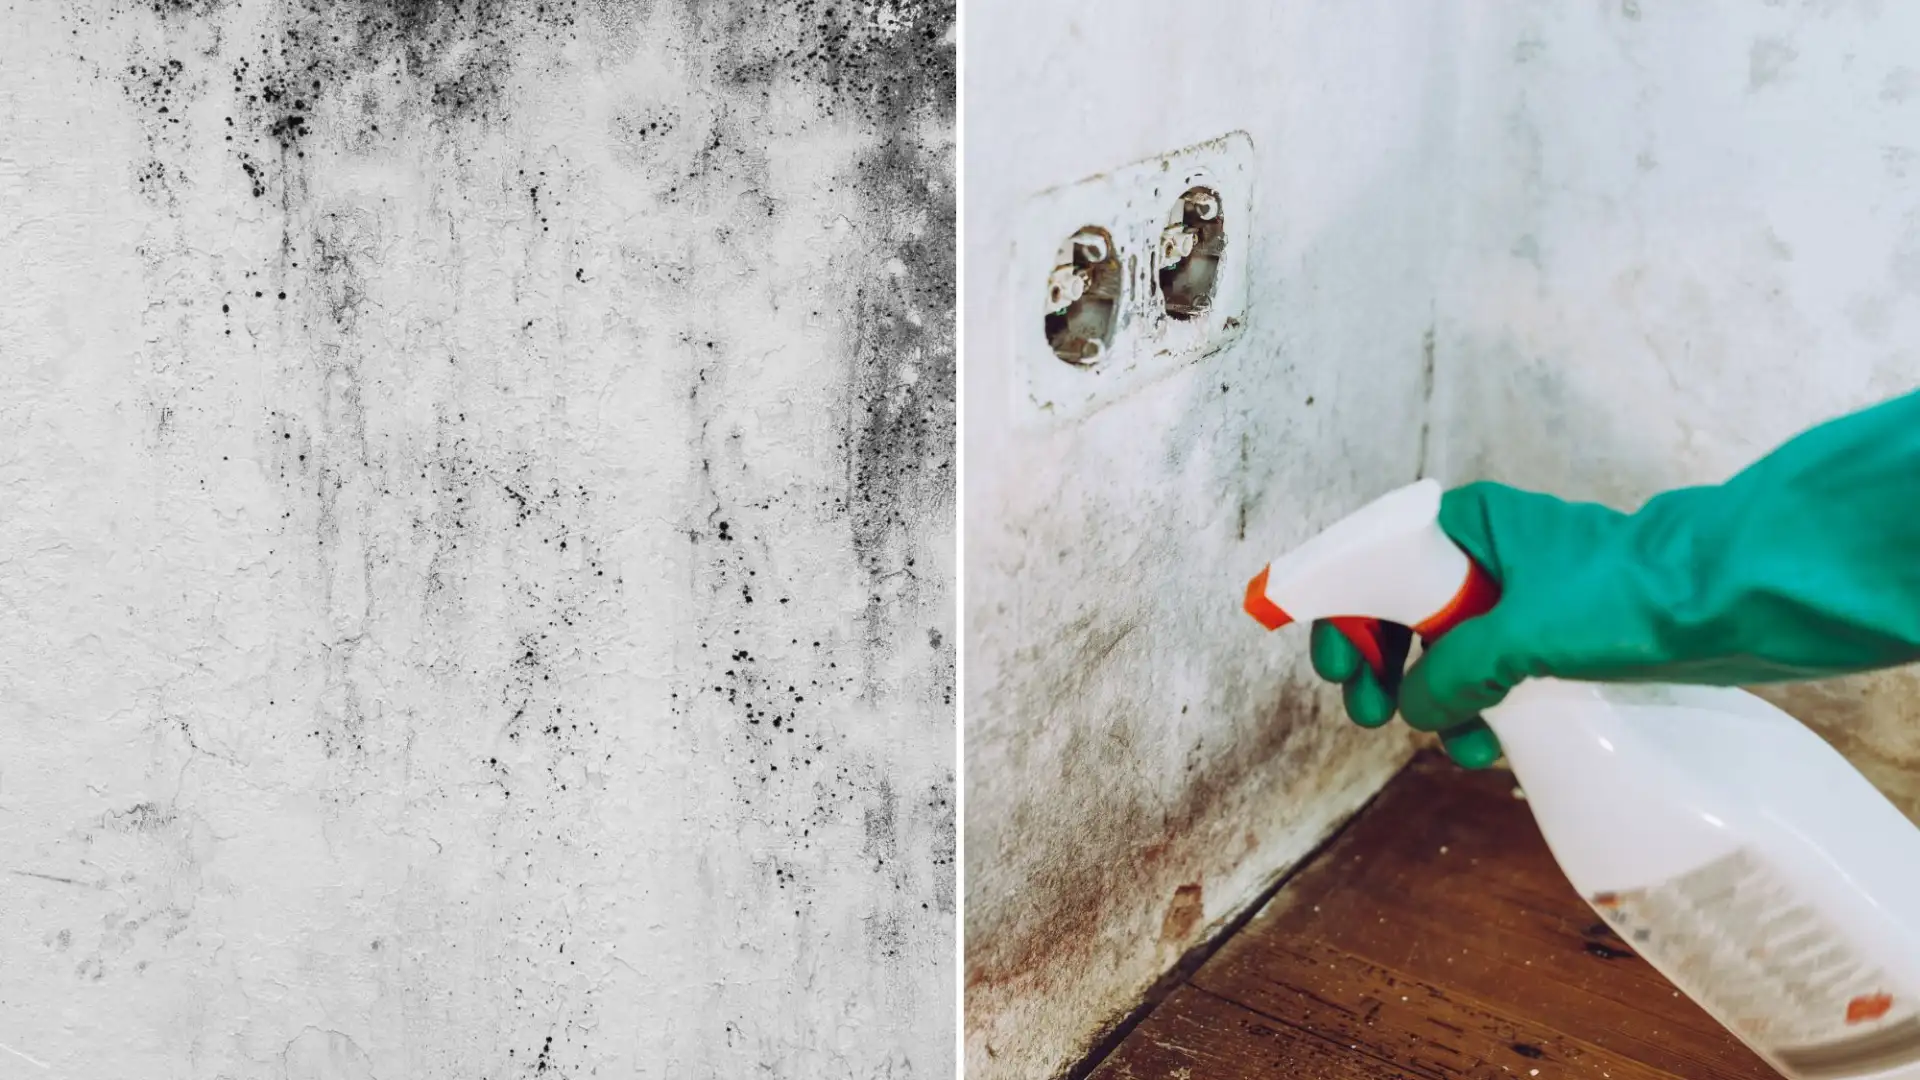
Are you tired of looking at a grimy, soap-scum-covered shower? A clean shower can make a world of difference in your daily routine. In this comprehensive guide, we'll walk you through the steps to deep clean your shower and remove even the toughest soap scum. We'll cover everything from the best cleaning products to effective cleaning techniques. So, let's get started!
Is your shower starting to look a little less than pristine? Over time, soap scum, mold, and mineral deposits can build up, making your shower a less than inviting place. But don't worry, with a little elbow grease and the right cleaning products, you can have a sparkling clean shower in no time. In this guide, we'll walk you through a five-step process to deep clean your shower and keep it looking its best.
Step 1: Gather Your Supplies Before you start cleaning, make sure you have all the necessary supplies on hand. You'll need:
- A heavy-duty shower cleaner
- A natural cleaner like vinegar or baking soda (for sensitive skin or a more eco-friendly option)
- A scrub brush
- A microfiber cloth
- Rubber gloves
- A squeegee
Step 2: Prepare the Shower To start, remove any items from your shower, such as shampoo bottles or loofahs. This will give you plenty of room to work. Next, close the shower door or curtain to prevent water from splashing onto other surfaces.
Step 3: Apply the Cleaner Begin by applying your chosen cleaner to the walls, floor, and any other surfaces in your shower. Pay special attention to areas with heavy buildup, such as the grout lines and around the drain. Allow the cleaner to sit for the amount of time specified on the product label.
Step 4: Scrub Once the cleaner has had a chance to work, use your scrub brush to scrub away any stubborn dirt, grime, or soap scum. For tough stains, you may need to scrub more vigorously. If you're using a natural cleaner like vinegar, you can create a paste by mixing it with baking soda and applying it to stubborn stains.
Step 5: Rinse and Dry After scrubbing, thoroughly rinse the shower with warm water to remove any remaining cleaner and debris. Use a squeegee to remove excess water from the walls and glass doors to prevent water spots and mildew growth. Finish by wiping down the shower with a microfiber cloth to dry any remaining moisture.
Additional Tips for a Sparkling Clean Shower
- Clean regularly: To prevent buildup, it's best to clean your shower on a weekly basis.
- Ventilate your bathroom: After showering, open a window or turn on the exhaust fan to help reduce moisture and prevent mold growth.
- Use a shower door squeegee: Squeegeeing your shower door after each use can help prevent water spots and soap scum buildup.
- Consider a handheld showerhead: A handheld showerhead can make it easier to clean hard-to-reach areas.
By following these five simple steps, you can keep your shower sparkling clean and looking its best. Remember, a clean shower can not only improve the appearance of your bathroom but also promote a healthier living environment.
How to clean a shower in 5 steps
Learning how to clean your shower is quick and easy if you remember these basics:
1. Give everything a quick rinse
The phrase "give everything a quick rinse" is a simple yet effective reminder of a crucial step in maintaining a clean and healthy kitchen. Rinsing food items before consumption is a fundamental practice in food safety. It helps remove dirt, pesticides, and other contaminants that may be present on the surface of produce. In this article, we'll explore the importance of rinsing various food items and delve into the best practices for achieving a thorough clean.
Rinsing Produce
When it comes to fruits and vegetables, a quick rinse under cold running water is often sufficient to remove loose dirt and debris. However, for items with thick skins or those that may have been exposed to pesticides, a more vigorous scrub is necessary. To ensure optimal cleanliness, consider using a produce brush to gently scrub the surface of fruits and vegetables. Leafy greens should be thoroughly rinsed in a colander to remove any sand or grit.
Rinsing Kitchen Utensils
Kitchen utensils, such as cutting boards, knives, and bowls, should be rinsed immediately after use to prevent the buildup of bacteria. For cutting boards, it's recommended to use hot, soapy water and a scrub brush to remove any food particles or residue. Knives should be washed separately to avoid dulling the blades. To sanitize cutting boards, a solution of one tablespoon of bleach per gallon of water can be used.
Rinsing Dishes
Rinsing dishes before loading them into the dishwasher can help remove food particles and grease, making it easier for the dishwasher to clean them effectively. For heavily soiled dishes, pre-rinsing with hot water and dish soap is recommended. It's also important to rinse off any sticky substances, such as syrup or gravy, before placing them in the dishwasher.
Benefits of Rinsing
The benefits of rinsing food items extend beyond simply removing dirt and debris. Rinsing can also help to:
- Reduce the risk of foodborne illness: By eliminating harmful bacteria, rinsing can help prevent food poisoning.
- Preserve the freshness and flavor of food: Removing dirt and contaminants can help to prolong the shelf life of produce and enhance its taste.
- Maintain a clean kitchen environment: Regular rinsing helps to prevent the spread of bacteria and cross-contamination.
Incorporating the simple habit of rinsing food items into your daily routine can have a significant impact on your overall health and well-being. By following these guidelines, you can ensure that your food is clean, safe, and ready to enjoy. Remember, a quick rinse can go a long way in promoting food safety and maintaining a hygienic kitchen.
2. Descale the shower head
A clogged shower head can significantly diminish your shower experience. Over time, mineral deposits from your water can build up on the tiny holes of your shower head, reducing water flow and pressure. This process, known as scaling, not only affects the aesthetics of your shower but can also lead to the growth of bacteria. Descaling your shower head regularly ensures optimal performance and a cleaner, more hygienic shower.
Identifying the Signs of a Scaled Shower Head
Before you begin the descaling process, it's crucial to identify the signs of a scaled shower head. Some common indicators include:
- Reduced water flow: If you notice a significant decrease in the amount of water coming out of your shower head, it's a clear sign that it's time for a deep clean.
- Weak water pressure: Mineral deposits can restrict the water flow, resulting in a weak and inconsistent spray.
- Uneven spray pattern: If the water spray from your shower head is uneven or comes out in small, concentrated streams, it's likely due to mineral buildup.
- Visible mineral deposits: White or yellowish deposits on the surface of your shower head are a direct indication of scaling.
Choosing the Right Descaling Solution
There are several effective descaling solutions available, each with its own advantages and disadvantages. Some popular options include:
- White vinegar: A natural and cost-effective solution that can dissolve mineral deposits without damaging most shower head materials.
- Commercial descaling agents: These products are specifically designed to remove mineral buildup and are often more potent than vinegar.
- Lemon juice: A gentler option that can be effective for light scaling.
The Descaling Process
- Gather your materials: Before you begin, gather all the necessary materials, including your chosen descaling solution, a plastic bag, rubber bands, and an old toothbrush.
- Prepare the shower head: Turn off the water supply to the shower head. Remove the shower head from the pipe by twisting it counterclockwise.
- Soak the shower head: Fill a plastic bag with your chosen descaling solution and place the shower head inside. Secure the bag around the shower head using rubber bands to ensure it's fully submerged.
- Soaking time: Allow the shower head to soak in the descaling solution for several hours or overnight. The soaking time may vary depending on the severity of the scaling.
- Scrub the shower head: After the soaking period, remove the shower head from the bag and scrub away any remaining mineral deposits using an old toothbrush.
- Rinse thoroughly: Rinse the shower head thoroughly with warm water to remove any remaining descaling solution and loose mineral particles.
- Reassemble: Reattach the shower head to the pipe by twisting it clockwise until it's secure.
Preventing Future Scaling
To minimize the frequency of descaling, consider the following tips:
- Install a water softener: A water softener can significantly reduce the amount of minerals in your water, preventing the buildup of scale on your shower head.
- Regular cleaning: Clean your shower head with mild soap and water on a regular basis to prevent the buildup of dirt and grime.
- Use a filtered shower head: A filtered shower head can help to remove impurities from your water, reducing the amount of mineral deposits that can accumulate on the shower head.
3. Deep clean shower tiles
Shower tiles, being constantly exposed to moisture, soap scum, and various other grime, require regular deep cleaning. This not only enhances the aesthetic appeal of your bathroom but also helps prevent the growth of mold and mildew, ensuring a healthier environment. Neglecting this task can lead to stubborn stains, discoloration, and even damage to the grout.
Choosing the Right Cleaning Products
The effectiveness of your deep cleaning routine hinges on the products you use. For a thorough clean, you'll need a few essential items:
- A natural cleaner: White vinegar is a fantastic natural cleaner that can cut through soap scum and grime without harsh chemicals.
- A commercial tile cleaner: If natural cleaners aren't cutting it, opt for a commercial tile cleaner specifically designed to remove tough stains.
- A grout brush: This tool is essential for scrubbing grout lines, where dirt and grime tend to accumulate.
- A soft-bristled brush: This is gentler on the tiles and can be used for overall cleaning.
- Microfiber cloths: These are highly absorbent and can be used for both cleaning and drying.
Step-by-Step Deep Cleaning Guide
- Prepare the Area:
- Clear the space: Remove any items, such as shampoo bottles or shower caddies, from the shower area.
- Protect surrounding areas: Cover any nearby surfaces, like a wooden vanity or a fabric shower curtain, with plastic to prevent them from getting wet or damaged.
- Pre-treat Stubborn Stains:
- Apply a concentrated cleaner: For particularly stubborn stains, apply a concentrated cleaner directly to the affected area and let it sit for a few minutes.
- Clean the Tiles:
- Create a cleaning solution: Mix equal parts white vinegar and water in a spray bottle.
- Apply the solution: Spray the solution liberally onto the tiles and grout lines.
- Scrub: Use a grout brush to scrub the grout lines, paying close attention to areas with built-up grime. For the tiles, use a soft-bristled brush.
- Rinse:
- Thoroughly rinse: Use a showerhead to rinse off the cleaning solution and any loosened dirt.
- Dry:
- Use a microfiber cloth: Dry the tiles and grout lines completely with a microfiber cloth.
4. Clean the grout between the tiles
Grout, the mortar used to fill the gaps between tiles, can quickly become discolored and accumulate dirt, mold, and mildew. Over time, this can make your tiles look dull and dingy. Regular grout cleaning is essential to maintain the appearance and hygiene of your tiled surfaces. In this guide, we'll explore the importance of grout cleaning, the tools and materials you'll need, and step-by-step instructions for achieving a sparkling clean grout line.
Why is grout cleaning important? Beyond aesthetics, dirty grout can harbor bacteria and allergens, posing a health risk, especially in areas like bathrooms and kitchens. Regular cleaning can help prevent the growth of mold and mildew, which can cause respiratory problems and damage your tiles. Moreover, a clean grout line can make your entire space look more polished and inviting.Choosing the right cleaning solution is crucial for effective grout cleaning. While commercial grout cleaners are readily available, there are also many natural alternatives that can be just as effective. A mixture of baking soda and water can create a gentle abrasive scrub, while a solution of vinegar and water can help cut through grime and soap scum. For stubborn stains, a hydrogen peroxide-based cleaner may be necessary.
Step-by-step guide to cleaning grout:
- Prepare the area: Remove any loose debris or items from the grout lines. Protect surrounding surfaces with masking tape or plastic sheeting.
- Mix your cleaning solution: Choose a cleaning solution based on the severity of the stains and the type of grout.
- Apply the solution: Using a toothbrush or grout brush, apply the cleaning solution to the grout lines. Allow it to sit for the recommended amount of time.
- Scrub: Scrub the grout lines vigorously with a brush to loosen dirt and grime. Pay close attention to areas with heavy buildup.
- Rinse: Rinse the grout thoroughly with clean water to remove any residue.
- Dry: Use a microfiber cloth to dry the grout lines completely.
Maintaining a clean grout line: After deep cleaning, it's essential to maintain your grout to prevent future buildup. Regular sweeping or vacuuming can help remove loose dirt, and a weekly wipe-down with a damp cloth can prevent the accumulation of soap scum and other grime. Additionally, sealing your grout can help protect it from stains and make it easier to clean.
Grout cleaning tools and equipment: While a toothbrush and cleaning solution can be sufficient for most grout cleaning tasks, there are also specialized tools available to make the job easier. A grout cleaning brush with a stiff bristle can help remove stubborn stains, and a grout cleaning machine can provide a more thorough cleaning.
Natural vs. commercial grout cleaners: When choosing a grout cleaner, you have the option of using a commercial product or creating a natural solution. Commercial cleaners often contain harsh chemicals that can be harmful to the environment and may irritate your skin. Natural cleaners, such as baking soda and vinegar, are generally safer and more affordable.
Conclusion: Regular grout cleaning is an essential part of maintaining a clean and healthy home. By following these tips and choosing the right cleaning products, you can easily restore your grout to its former glory and enjoy a beautiful, sparkling clean tiled surface.
5. De-clog the drain
A clogged drain can be a frustrating and messy problem in any household. Whether it's a slow-moving kitchen sink or a completely blocked bathroom drain, a clogged drain can disrupt your daily routine and cause water damage if left untreated. Fortunately, there are several effective methods to unclog a drain without resorting to harsh chemicals. This comprehensive guide will provide you with step-by-step instructions on how to unclog a variety of drains, as well as tips for preventing future clogs.
Common Causes of Clogged Drains
Before diving into the solutions, let's explore some of the common culprits behind clogged drains. Hair, food particles, soap scum, grease, and tree roots are among the most frequent causes. Hair, for instance, can easily accumulate in bathroom drains and form a tight plug, while grease and food particles can build up over time in kitchen sinks. Understanding the cause of the clog will help you choose the most appropriate cleaning method.
DIY Drain Cleaning Methods
1. Plunger: A plunger is a simple yet effective tool for unclogging most drains. To use a plunger, ensure that the rubber cup completely covers the drain opening. Create a tight seal by placing a wet cloth around the plunger. Then, vigorously plunge up and down several times. This creates a suction that can break up the clog and force it down the drain.
2. Baking Soda and Vinegar: This natural and inexpensive method is ideal for minor clogs. Pour a cup of baking soda down the drain, followed by a cup of white vinegar. Cover the drain with a plug or cloth and allow the mixture to sit for about an hour. The chemical reaction between the baking soda and vinegar will help to break down the clog. After an hour, flush the drain with hot water.
3. Plumbing Snake: For more stubborn clogs, a plumbing snake, also known as a drain auger, may be necessary. A plumbing snake is a long, flexible cable with a hook or spiral at the end. Insert the snake into the drain and carefully feed it through until you feel resistance. Crank the handle to break up the clog and then slowly retract the snake.
Preventing Future Clogs
- Hair Catcher: Use a hair catcher in your shower and bathtub drains to prevent hair from going down the drain.
- Grease Trap: Avoid pouring grease or oil down the kitchen sink. Let it cool and solidify before disposing of it in the trash.
- Food Scraps: Use a garbage disposal or compost bin to dispose of food scraps, rather than grinding them up in the sink.
- Regular Cleaning: Run hot water down your drains regularly to help prevent buildup.
When to Call a Professional
If you've tried all of the above methods and the clog persists, it may be time to call a professional plumber. A plumber can use specialized equipment to clear stubborn clogs and identify any underlying plumbing issues.
Tips for removing soap scum from shower glass
A pristine shower is more than just aesthetically pleasing; it’s a sanctuary where you can unwind after a long day. However, the buildup of soap scum can quickly transform your once sparkling shower into a grimy eyesore. This comprehensive guide will provide you with effective and natural methods to banish soap scum from your shower glass, leaving it sparkling clean.
Tip 1: Regularly clean with vinegar
Vinegar, a humble kitchen staple, has been used for centuries as a natural cleaning agent. Its acidic properties make it an effective disinfectant and deodorizer, capable of cutting through grease and grime. Whether you're looking for eco-friendly cleaning solutions or simply want to save money, incorporating vinegar into your regular cleaning routine can yield impressive results.
Vinegar: A Versatile Cleaning Solution
- Disinfecting surfaces: Vinegar’s acidic nature makes it a potent disinfectant, capable of killing a wide range of bacteria, including E. coli and Salmonella. By regularly cleaning kitchen countertops, cutting boards, and other high-touch surfaces with a vinegar solution, you can significantly reduce the risk of foodborne illness.
- Eliminating odors: The strong, pungent smell of vinegar can neutralize unpleasant odors caused by mold, mildew, and pet accidents. To eliminate stubborn odors, simply spray a vinegar solution onto the affected area and allow it to air dry. For particularly tough odors, consider creating a vinegar-based cleaning paste.
- Cutting through grease: Vinegar's acidity can break down grease and oil, making it an excellent choice for cleaning greasy stovetops, ovens, and kitchen appliances. To remove stubborn grease, create a paste by combining equal parts vinegar and baking soda, then apply it to the affected area and let it sit for several minutes before scrubbing.
- Removing mineral deposits: Hard water can leave unsightly mineral deposits on faucets, showerheads, and other plumbing fixtures. Vinegar's acidity can help dissolve these deposits, restoring your fixtures to their original shine. To remove mineral deposits, fill a plastic bag with vinegar and secure it around the affected area overnight.
Creating a Custom Vinegar Cleaning Solution
To create a versatile vinegar cleaning solution, combine equal parts white vinegar and water in a spray bottle. For tougher cleaning jobs, you may want to increase the proportion of vinegar. To add a pleasant scent, consider adding a few drops of your favorite essential oil, such as lavender or lemon.
Tip 2: Use a filtered shower head
In today's world, where concerns about water quality are at an all-time high, individuals are seeking innovative solutions to enhance their bathing experience. One such solution gaining popularity is the use of a filtered shower head. By installing a filtered shower head, individuals can significantly improve the quality of the water that comes into contact with their skin and hair, leading to a myriad of benefits, including softer skin, shinier hair, and reduced exposure to harmful contaminants.
The Benefits of Filtered Shower Water
Filtered shower heads are designed to remove a wide range of impurities from the water, such as chlorine, heavy metals, and sediment. Chlorine, a common additive in municipal water supplies, can strip the natural oils from your skin and hair, leaving them dry and brittle. By eliminating chlorine, filtered shower heads can help to restore the natural moisture balance of your skin and hair. Additionally, heavy metals, such as lead, can be harmful when absorbed through the skin, and filtered shower heads can effectively reduce your exposure to these toxins.
Choosing the Right Filtered Shower Head
When selecting a filtered shower head, it is important to consider the specific contaminants present in your local water supply. Some filtered shower heads are designed to remove a broad spectrum of impurities, while others are specifically formulated to target certain contaminants. For example, if you are concerned about the level of chlorine in your water, you may want to choose a shower head that is equipped with a vitamin C filter. Vitamin C is a powerful antioxidant that can neutralize chlorine and other harmful chemicals.
Long-Term Benefits of Filtered Showering
In addition to the immediate benefits of softer skin and shinier hair, using a filtered shower head can also have long-term health benefits. By reducing your exposure to harmful contaminants, you may be able to lower your risk of developing certain skin conditions, such as eczema and psoriasis. Furthermore, some studies have suggested that filtered showering may help to improve respiratory health by reducing the amount of airborne pollutants that are inhaled during a shower.
Addressing Common Concerns
One common concern about filtered shower heads is that they may reduce water pressure. However, many modern filtered shower heads are designed to provide a powerful and invigorating shower experience, even while effectively filtering the water. Additionally, some people may be concerned about the cost of purchasing and maintaining a filtered shower head. While the initial investment may be higher than that of a standard shower head, the long-term benefits and cost savings associated with reduced water damage to plumbing fixtures can make filtered shower heads a worthwhile investment.
Tip 3: Switch to a different soap
Have you tried everything to achieve that radiant, glowing complexion, but still feel like something's missing? Perhaps it's time to take a closer look at your skincare routine. One often overlooked aspect is the soap you use. While soap may seem like a simple product, choosing the wrong one can strip your skin of its natural oils, leading to dryness, irritation, and even breakouts.
Understanding Your Skin Type
Before diving into different soap options, it's essential to understand your skin type. Are you oily, dry, combination, or sensitive? Each skin type has unique needs, and the right soap can make a world of difference.
- Oily Skin: Look for soaps with ingredients like salicylic acid or benzoyl peroxide, which help control excess oil production and prevent clogged pores.
- Dry Skin: Opt for gentle, hydrating cleansers that contain moisturizing ingredients such as glycerin, hyaluronic acid, or shea butter.
- Combination Skin: Balance your skin's needs with a cleanser that targets both oily and dry areas. Look for products with a combination of oil-controlling and hydrating ingredients.
- Sensitive Skin: Choose fragrance-free, hypoallergenic cleansers with minimal ingredients to reduce the risk of irritation.
The Importance of pH Balance
The pH level of your skin is crucial for maintaining a healthy skin barrier. Most soaps have a high pH level, which can strip away your skin's natural oils and disrupt its pH balance. Look for cleansers with a pH level that is closer to your skin's natural pH of 5.5.
Natural vs. Synthetic Ingredients
The ingredients in your soap can have a significant impact on your skin's health. Natural soaps, made with plant-based oils and butters, are often gentler on the skin and free from harsh chemicals. Synthetic soaps, on the other hand, may contain harsh detergents and fragrances that can irritate sensitive skin.
Long-Term Benefits of Switching Soaps
Switching to a more suitable soap can offer a range of long-term benefits, including:
- Improved skin texture: A gentle cleanser can help to refine your skin's texture, leaving it feeling soft and smooth.
- Reduced breakouts: The right soap can help to prevent clogged pores and reduce the frequency of breakouts.
- Minimized redness and irritation: Gentle cleansers are less likely to trigger redness or irritation, especially for those with sensitive skin.
- Enhanced skin hydration: Hydrating cleansers can help to lock in moisture and prevent dryness.
Tip 4: Wash down the shower glass
Maintaining a sparkling clean shower glass is essential for a refreshing and hygienic bathing experience. Over time, soap scum, hard water stains, and mildew can accumulate on the glass, making it appear dull and grimy. In this comprehensive guide, we will delve into the best practices for keeping your shower glass spotless. From choosing the right cleaning products to effective cleaning techniques, we've got you covered.
Understanding the Challenges
Shower glass is particularly susceptible to grime buildup due to the constant exposure to moisture, soap, and body oils. Hard water, in particular, can leave stubborn mineral deposits that are difficult to remove. Additionally, mildew thrives in damp environments, often appearing as dark spots or streaks on the glass. To combat these challenges, it's crucial to establish a regular cleaning routine and use the appropriate cleaning agents.
Choosing the Right Cleaning Products
The effectiveness of your shower glass cleaning routine largely depends on the products you use. Commercial shower cleaners are readily available and can be highly effective, but they often contain harsh chemicals that may irritate your skin or damage the glass. For a more natural and eco-friendly approach, consider using a mixture of white vinegar and water. Vinegar's acidity helps to dissolve mineral deposits and soap scum, while baking soda can be used as a gentle abrasive to scrub away stubborn stains.
The Cleaning Process
- Preparation: Before you begin cleaning, ensure that the shower is cool and dry. This will help the cleaning solution adhere to the glass and make it easier to remove grime.
- Application: Apply your chosen cleaning solution to the glass using a spray bottle or a soft cloth. For stubborn stains, allow the solution to sit for a few minutes before scrubbing.
- Scrubbing: Use a non-abrasive scrub brush or sponge to gently scrub the glass, paying close attention to areas with heavy buildup. Avoid using steel wool or other abrasive materials, as these can scratch the glass.
- Rinsing: Thoroughly rinse the glass with warm water to remove all traces of the cleaning solution and any loosened grime.
- Drying: Use a squeegee to remove any excess water and prevent water spots from forming. Finish by drying the glass with a microfiber cloth.
Preventing Future Buildup
- Regular Cleaning: The key to maintaining a sparkling clean shower glass is to establish a regular cleaning routine. Aim to clean your shower glass at least once a week to prevent the buildup of grime.
- Squeegee After Each Shower: Using a squeegee to remove excess water after each shower can significantly reduce the amount of soap scum and hard water stains that accumulate on the glass.
- Ventilation: Ensure that your bathroom has adequate ventilation to help reduce humidity and prevent the growth of mildew.
- Water Softener: If you have hard water, installing a water softener can help to reduce mineral deposits on your shower glass.
By following these tips and incorporating a regular cleaning routine, you can keep your shower glass sparkling clean and free of grime. Remember to choose the right cleaning products, and use gentle scrubbing techniques to avoid damaging the glass. With a little effort, you can enjoy a fresh and inviting shower experience every time.
What removes hard soap scum from a shower?
A sparkling clean shower is not just aesthetically pleasing; it's also a hygienic necessity. Soap scum, that stubborn, filmy residue left behind by hard water and soap, can accumulate over time, making your shower look dingy and feel slippery. But fear not! With the right knowledge and cleaning products, you can easily banish soap scum and restore your shower to its former glory.
Understanding Soap Scum
Soap scum is primarily caused by the reaction between hard water minerals (like calcium and magnesium) and the fatty acids in soap. When these substances mix, they form an insoluble compound that adheres to shower surfaces. Over time, this buildup can become quite stubborn and difficult to remove.
Factors Contributing to Soap Scum Buildup
- Hard Water: The higher the mineral content in your water, the more likely you are to experience soap scum buildup.
- Soap Type: Certain soaps, particularly those containing oils or butters, can contribute to more significant soap scum formation.
- Poor Ventilation: Inadequate ventilation in your bathroom can trap moisture and promote the growth of mold and mildew, which can exacerbate soap scum problems.
- Insufficient Cleaning: Regular cleaning is essential to prevent soap scum from becoming a persistent issue.
Effective Cleaning Products and Techniques
- Commercial Cleaners: There are numerous commercial cleaners specifically designed to remove soap scum. These products typically contain acidic ingredients that can break down mineral deposits.
- Natural Cleaners: For those who prefer a more eco-friendly approach, natural cleaners like vinegar, baking soda, and lemon juice can be effective in removing soap scum.
- Cleaning Tools: A variety of tools can be used to scrub away soap scum, including sponges, scrub brushes, and non-abrasive pads.
- Regular Cleaning: The key to preventing soap scum buildup is to clean your shower regularly. Aim to clean your shower at least once a week to prevent the buildup of soap scum and other grime.
Step-by-Step Guide to Removing Soap Scum
- Prepare the Area: Remove any personal items from the shower and ensure the area is well-ventilated.
- Apply Cleaner: Apply your chosen cleaning product to the affected areas, allowing it to dwell for the recommended amount of time.
- Scrub: Use a scrub brush or non-abrasive pad to scrub away the soap scum. Pay particular attention to areas where buildup is most stubborn, such as around faucets and showerheads.
- Rinse: Thoroughly rinse the shower with clean water to remove any residue.
- Dry: Use a squeegee or microfiber cloth to dry the shower surfaces, preventing water spots and future soap scum buildup.
Does bleach remove soap scum?
Soap scum, a common household annoyance, is the filmy residue left behind after soap or detergent comes into contact with hard water minerals like calcium and magnesium. It typically forms on bathroom fixtures, shower doors, and tiles, giving surfaces a grimy appearance. Bleach, a powerful disinfectant and bleaching agent, is often used for cleaning and sanitizing. But does it effectively remove soap scum?
Bleach: A Powerful Cleaning Tool
Bleach is highly effective at killing bacteria and viruses, making it a go-to choice for sanitizing surfaces. Its oxidizing properties can break down organic matter, including soap scum. However, bleach's effectiveness in removing soap scum depends on several factors, such as:
- Concentration of bleach: A higher concentration of bleach typically provides better results.
- Contact time: Allowing bleach to sit on the surface for an extended period gives it more time to work.
- Surface material: Porous surfaces may require more frequent or concentrated bleach applications.
- Severity of the soap scum buildup: Heavy buildup may require multiple applications or additional cleaning methods.
Factors to Consider Before Using Bleach
While bleach is a potent cleaning agent, it's important to use it cautiously. Here are some factors to consider before using bleach to remove soap scum:
- Safety precautions: Bleach is a corrosive substance and can cause skin irritation, eye damage, and respiratory problems. Always wear protective gloves and eyewear when handling bleach.
- Surface compatibility: Bleach can discolor or damage certain materials, such as natural stone or fabrics. Test bleach on a small, inconspicuous area before applying it to a larger surface.
- Ventilation: Ensure proper ventilation when using bleach, as the fumes can be irritating.
- Environmental impact: Bleach can harm aquatic life and should be used sparingly and disposed of properly.
Alternative Cleaning Methods
If you're hesitant to use bleach or have surfaces that are incompatible with it, there are several alternative cleaning methods for removing soap scum:
- Vinegar: White vinegar is a natural and non-toxic cleaning agent that can effectively dissolve mineral deposits.
- Baking soda: Baking soda is a gentle abrasive that can help scrub away soap scum.
- Commercial cleaners: There are many commercial cleaners specifically designed to remove soap scum without harsh chemicals.
Preventive Measures
Preventing soap scum buildup is easier than removing it. Consider these tips:
- Regular cleaning: Clean your bathroom regularly to prevent soap scum from accumulating.
- Squeegee your shower door: After each shower, use a squeegee to remove excess water and soap residue.
- Use a water softener: If you have hard water, installing a water softener can help reduce mineral deposits and soap scum buildup.
- Choose phosphate-free detergents: Phosphates can contribute to soap scum formation.
Bleach can be an effective tool for removing soap scum, but it's important to use it safely and appropriately. By understanding the factors that affect bleach's effectiveness and considering alternative cleaning methods, you can choose the best approach for your specific cleaning needs. Regular cleaning and preventative measures can help minimize soap scum buildup and keep your bathroom sparkling.
Does vinegar remove soap scum?
Soap scum, that unsightly film that often forms on bathroom fixtures, is a result of the reaction between the minerals in hard water and the fatty acids in soap. Over time, this buildup can become quite stubborn and unsightly. Vinegar, on the other hand, is a natural cleaning agent with mild acidity that can effectively break down mineral deposits. Its acidic nature makes it an ideal choice for tackling soap scum.
How Vinegar Works to Remove Soap Scum
The acetic acid present in vinegar is the key to its cleaning power. When applied to soap scum, the acid reacts with the mineral deposits, breaking them down into smaller, more easily removable particles. Additionally, vinegar can also help to soften the scum, making it easier to wipe away.
- Chemical Reaction: The acidic nature of vinegar reacts with the alkaline minerals in soap scum, causing a chemical reaction that breaks down the buildup.
- Softening: Vinegar helps to soften the hard, mineral deposits, making them more pliable and easier to remove.
- Deodorizing: Beyond its cleaning properties, vinegar also has a natural deodorizing effect, helping to eliminate any unpleasant odors associated with soap scum.
Using Vinegar to Clean Soap Scum
To use vinegar to clean soap scum, simply apply a solution of equal parts white vinegar and water to the affected area. Allow the solution to sit for a few minutes to give the acid time to work. Then, scrub the surface with a soft-bristled brush. For stubborn stains, you may need to repeat the process or let the solution sit for a longer period.
- Spray Bottle: For easy application, transfer the vinegar solution to a spray bottle.
- Soaking: For particularly stubborn soap scum, soak a cloth in the vinegar solution and place it over the affected area. Secure the cloth with plastic wrap and allow it to sit for several hours or overnight.
Safety Precautions
While vinegar is generally safe to use, it is important to take a few precautions.
- Ventilation: Vinegar has a strong odor, so ensure adequate ventilation when using it indoors.
- Protective Gear: Wear rubber gloves to protect your hands from the acid.
- Sensitive Surfaces: Test the vinegar solution on a small, inconspicuous area first to ensure it does not damage the surface.
Vinegar vs. Commercial Cleaners
Many commercial cleaners contain harsh chemicals that can be harmful to both people and the environment. Vinegar, on the other hand, is a natural, non-toxic alternative that is safe for most surfaces. While commercial cleaners may offer faster results, vinegar provides a more sustainable and cost-effective solution.
- Cost-Effective: Vinegar is a much more affordable option than commercial cleaners.
- Environmentally Friendly: Vinegar is biodegradable and does not contain harmful chemicals.
- Versatility: Vinegar can be used for a variety of cleaning tasks beyond removing soap scum.
